|
Stock Painting Guide
Tips on Color and Clear-Coat Paint Application by Mike Ricklefs
Other AccurateShooter.com TECH Articles >
Have a old stock in dire need of a "make-over"? Have you recently purchased a laminated wood stock that needs a finish, or a fiberglass stock that you want to customize? Here's a step-by-step guide to stock painting and clear-coating. It guides you through the process, from initial stock prep and clean-up, to the final wet-sanding and buffing. These procedures work. Here's a GALLERY of stocks painted with the methods and materials recommended here.

Our Guide to Stock Painting is prepared with the help of Mike Ricklefs from Iowa. A mechanical engineer by trade, Mike is an artist at heart, who loves to create beautiful finishes for wood and glass stocks, as you can see on his website, www.MikeRicklefs.com, and this gallery. Mike sticks to basic colors, gradients, and clear-coating. By his own admission, he doesn't do airbrushing or painted illustrations. Mike says: "I'll leave that to guys like Matt Kavanaugh and Bayou Custom--they are true masters." Mike can do flames, logos, and text that use vinyl cut-out masks. However, in this article, we don't cover the use of masks and custom decals because that requires special templating equipment, and an experienced hand. If you want flames and paint-on logos, we suggest you leave that kind of work to the experts. But otherwise, if you follow Mike's directions, use the right materials and methods, you can achieve outstanding results. Click HERE to see a variety of Mike's finished products, both with color paint and clear finish over wood laminate.
The Art of Stock Painting by Mike Ricklefs
Over the last couple of years I have been asked a lot of questions about paint and prep work. I thought I would document the steps I use to finish a stock. For this article, I started out with two previously painted Lee Six Hunter BR class stocks and a new Lee Six Borden-style stock. What follows below is my step-by-step procedure. I am sure there are different processes and products that can be used. This is what works for me--it may or may not work for you.
| WARNING: Many of the materials used for stock painting and clear-coating contain potentially dangerous chemicals. Follow all local regulations pertaining to paint spraying and disposal. Always use a respirator and use a fresh-air system if possible. Paint in a well-ventilated area, and always follow manufacturers' safety guidelines for all products. |
| 1 | STOCK PREP -- Clean-Up and Sanding |
Initial stock prep involves multiple tasks: removing paint, sanding out flaws, and filling in problem areas. Take your time and do the job right. With the two previously-painted Hunter BR stocks, I used a combination of lacquer thinner, razor blades, sand paper and elbow grease. After a couple of hours, both Hunter BR stocks cleaned up nicely. A minimal amount of filler was used to clean up the parting lines so there won't be too much more work required to get these stocks ready for primer application.
TOOL-TIP: Use a sanding block to maintain straight lines and be careful not to round off corners. I very seldom use a electric/air sander--they can get you in trouble real fast. I don't use chemical stripper because it will attack the substrate making it a gooey mess.

Both of the Hunter BR stocks started out with a Right Bolt/Right Port configuration. After refinishing, they will both be used as Right Bolt/Left Port rigs. The original right-side port cut-outs were filled with epoxy, and new port reliefs were milled on the opposite sides. The butt-pads on these two stocks were glued on. Otherwise I would have removed them. It is best to remove all the parts you can.
This raises an important point--if you have to make an major changes to the stock layout or inletting, do that BEFORE you lay down any primer or paint. Likewise, any repairs or fiberglass work should be done before you hook up the paint sprayer.

The white Hunter BR stock had a couple of layers of white paint on top of black primer. In the image above, I've removed nearly all the white paint, revealing the black primer underneath. The red stock has remnants of white/gray primer. Most of this remaining primer will come off as the parting lines and pin holes are filled and sanded.

The Lee Six Borden-style stock shown above is the third project stock for this article. This was a new, unpainted stock, so the prep work is a little different. I didn't have to remove old paint, but I did want to fill seams and smooth out the small flaws in the finish. The Borden-style stock was originally inletted for a Right Bolt/Right Port Nesika but is now used with a Stiller Diamondback Right Bolt/Left Port Drop-Port. It weighs in at 3 pounds, 2.4 ounces. As it is destined to be a 13.5-lb Heavy Varmint (HV), weight is not a major concern.
In the photo below, you can see the parting lines (seams). The parting line on the rear of this particular stock is off-set 0.060". This will be taken care of with filler and sanding. Looking at the photo below, in the smaller inset showing the underside of the stock, you can see the exit for the drop port.

| 2 | BODY WORK -- Fillers and Putty |
Some stocks are beautifully built and require very little work to fill voids and smooth up the surface. Unfortunately, that is not always the case. Many of the commercial fiberglass stocks also have seams or "parting lines" that can detract from their appearance. I prefer to fill in these flaws before applying paint. Moreover, a stock that has seen many seasons of use will have gouges and dings that need to be filled before you prime. Remember, if you want to end up with a perfectly smooth, mirror-like finish you need a very smooth, consistent surface to start with, free from voids, pin-holes, or low spots.
 To do a good filling job, don't just use any old putty from the auto parts store. What I have found to be best is Putty-Cote by Dynatron. It is a two-part filler. You mix a hardener with it to activate. You can use standard, lightweight body filler also known as Bondo. I like the Putty-Cote better because I feel I get a better surface finish. To do a good filling job, don't just use any old putty from the auto parts store. What I have found to be best is Putty-Cote by Dynatron. It is a two-part filler. You mix a hardener with it to activate. You can use standard, lightweight body filler also known as Bondo. I like the Putty-Cote better because I feel I get a better surface finish.
 One thing you should NOT use is the one-part Glazing and Spot Putty. This is also known as Red Lead. (The Bondo-brand version of this is shown at right.) This one-part spot putty is basically a very thick primer that does not get very hard when cured. Though cheap and easy to find, it really is the wrong material for the job. Such one-part putty takes over-night to dry and does not have the best adhesion. By contrast, if you use the Putty-Cote you can be sanding in 15 to 20 minutes. One thing you should NOT use is the one-part Glazing and Spot Putty. This is also known as Red Lead. (The Bondo-brand version of this is shown at right.) This one-part spot putty is basically a very thick primer that does not get very hard when cured. Though cheap and easy to find, it really is the wrong material for the job. Such one-part putty takes over-night to dry and does not have the best adhesion. By contrast, if you use the Putty-Cote you can be sanding in 15 to 20 minutes.

Here (above) are the Hunter BR stocks after the second application of putty. The lower stock is in very good condition and will not take much filler. The top stock is getting a skim coat down the whole parting line (where the seam appears). This stock also had an abundance of pin holes that needed to be filled.

Here is a view of the red Hunter stock after the third application of filler. The parting line is looking good, but there remained some pin holes on the bottom which required more work. Again, take your time and do the job right, so you don't have to go back and re-do things after you've applied paint.

Above is the Borden-style stock. Even though it is new, as you can see the parting line of this style of stock takes a bunch of work. It will take about four applications of filler before I have it the way I want it. Several thin coats are better than one thick one. You'll find that, over time, a really thick coat will shrink.

In the above photo, the "body work" on the stocks is almost complete. At this point, all flaws have been filled, and all surfaces have been block-sanded to 180 grit. The stocks are now ready for priming.
| 3 | PRIMING -- Laying the Foundation |
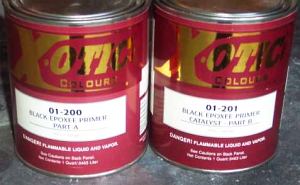 Any good painter will tell you that you can't have a great finish without a top-notch priming job underneath. I use very high-quality Xotic-brand two-part epoxy primers and I spend a lot of time laying down a smooth and even coat. You don't want to rush through the priming. I'll sand between coats, and I may add a little more filler along the way. Any good painter will tell you that you can't have a great finish without a top-notch priming job underneath. I use very high-quality Xotic-brand two-part epoxy primers and I spend a lot of time laying down a smooth and even coat. You don't want to rush through the priming. I'll sand between coats, and I may add a little more filler along the way.
Do not apply to thick of coats and make sure you allow the primer to "flash off" (dry thoroughly) between coats. If you rush here the primer will be cratered and be very rough. You will sand most of it off to get it smooth again. I usually go over the areas with the putty first, let that flash off, and then apply the remaining coats. The puttied areas get an extra coat. This helps fill the surface. The main thing is to have the surface one consistent color. This will ensure even coverage for the finish coats.

Here are all three stocks ready for priming. They have all been block-sanded to 180 grit. I've applied fresh masking tape applied to the bedding and butt pad area. You can see the shiny spots on the middle one. This is a wet surface that has not dried yet after been wiped down with reducer.
Take your time on the masking work. A little extra time spent at this point may save you a bunch later. On the edges of the bedding, I usually let the tape extend over the edge and trim with a razor blade. This ensures a tape edge that follows any contours. Try not to use too many layers of tape. Excess layers create a large "step" that will build up with paint. After unmasking you will see the raw edge and all the layers of paint.

This photo shows the stock covered with the first coat of Xotic brand two-part epoxy primer. You can see a few light spots. These will cover on the next coats.

Above are all three stocks after initial priming. I've applied two primer coats on all surfaces with a little extra coverage on the edges. But there is still more to do before they are ready for the color base coats. After 24 hours of drying, the next step will be to block sand these with 220 grit paper and then see if there are any areas that need to be filled. Then I will re-prime any new areas of filler. With Xotic primer no sealer is needed, so after sanding to 600 grit these will be ready to base coat. Prior to base-coating, I will remove the masking tape and apply new tape to the butt and bedding areas.
| 4 | BASE COATS -- Color and Clear |
 For base-coating, I use two products: Xotic Ebonee Black base coat and Jammin' Intercoat clear. The black base coat is applied in two (2) coats. Once that has flashed off (dried) then the Intercoat clear is applied. For base-coating, I use two products: Xotic Ebonee Black base coat and Jammin' Intercoat clear. The black base coat is applied in two (2) coats. Once that has flashed off (dried) then the Intercoat clear is applied.
Xotic also makes a variety of specialized base coats for Candy, Pearlescent, metal-flake, and color-shift (chameleon) effects. These require some skill in the application to achieve the final look you want, so experiment on a small sample before applying trick base-coats to your stock. These special-effect base-coat paints are quite expensive, so it's smart to learn the right techniques before spraying your entire stock. Xotic paints in small quantities (and kits with all needed supplies) are available from www.Innate.com and other specialty auto paint vendors.

Here you see a black base-coat applied to one of the Hunter BR stocks. It appears gray in the photo. However, the base coats dry to an even black, almost flat look. This is normal as it is the clear coat that gives it the shine.

Intercoat clear is applied where the paint masks will be applied. It acts as a protective barrier for the base coat. Above you see three (3) coats of black base and two (2) coats of Intercoat clear. You can see where I've applied flame masks applied and taped off other areas to be shielded from the black base coat. Using masks takes some skill. We don't cover the use of masks in stock painting in this article, but you will find basic information on my website, www.MikeRicklefs.com in the "How To" section.

The above photo shows a silver base coat. A silver or gold base coat is often preferred for bright candy colors and metallic finishes.
| 5 | ART EFFECTS -- Marble and Textures |
One very popular treatment for fiberglass stocks is a marble finish. You need a special "marblizer" paint for this and it requires you to physically "mold" the paint on to the stock. Here are two examples of a marble finish: green marble over black base, and tangerine candy over silver marble with a black base.


 I use House of Kolor "Marblizer" paints for most of my marble-finished stocks. There are many colors and "textures" available. For this Hunter BR stock, which was going to be a gold over black marble, I selected House of Color's Gold-Blue Marblizer. This is a dual-color paint, meaning that over a black base it appears gold while over a white base it will be blue. I use House of Kolor "Marblizer" paints for most of my marble-finished stocks. There are many colors and "textures" available. For this Hunter BR stock, which was going to be a gold over black marble, I selected House of Color's Gold-Blue Marblizer. This is a dual-color paint, meaning that over a black base it appears gold while over a white base it will be blue.
House of Kolor Marblizer paint comes ready to spray with no mixing needed. One good wet coat is applied. Don't worry about runs as they will be taken care of in the next step. The coat appears slightly green in the pictures but it is really gold. (In the photo you see a text mask--this is something special for this particular stock and I would not, normally, have a mask in place when doing a marble finish, or a plain color finish for that matter. But text and logos are special options I offer to my customers.)

Above one of the Hunter BR stocks has been sprayed with a coat of the Marblizer, over the black base-coat. You want a good, wet sloppy layer of Marblizer, because you manually block and smear the Marblizer paint into patterns. Here I used Saran Wrap to apply the pattern. It is applied over the wet Marblizer coat. As you press it and move it around you create patterns in the wet surface. Saran Wrap is just one option--cling wrap, bubble wrap, sponges, even metal foil--all these materials can be used to create the patterns. Experiment and have some fun. Pressing, rubbing, dragging of the items through the Marblizer will creat different effects and patterns.

In the photo above you can see how the Saran Wrap is gathered around the stock, creating folds and swirls which produce alternating light and dark areas on the stock. With practice, you can control the patterns to a certain extent, but each marble paint job is unique.

Here you can see the completed marble effect with Saran Wrap removed. It takes trial and error to achieve the particular patterns and textures you want. After clear-coating, the effect is more dramatic, with much more contrast. It is also hard to capture the full effect with a camera, because you need to see the light penetrating through the clear to the marble coats. (On this particular stock I used a paint mask to create lettering. When the yellow masks are removed, the type remains black underneath.)
| 6 | CLEAR COATING -- Gloss and Protection |
 For finishing both fiberglass and wood stocks, I prefer to use automotive clear-coat. This sprays easily, dries hard, and is less prone to yellowing than some of the urethanes. I use Dupont's Nason line "Select Clear" with a 4:1 mix. The key to getting a mirror-like finish is using multiple, light coats, and allowing plenty of time to dry hard. Typically I apply three (3) final coats of clear over a painted stock. When clear-coating a wood stock without a paint base, I will apply three (3) coats of final clear over five or six coats of heavier "build" clear. This is described in the section below. For finishing both fiberglass and wood stocks, I prefer to use automotive clear-coat. This sprays easily, dries hard, and is less prone to yellowing than some of the urethanes. I use Dupont's Nason line "Select Clear" with a 4:1 mix. The key to getting a mirror-like finish is using multiple, light coats, and allowing plenty of time to dry hard. Typically I apply three (3) final coats of clear over a painted stock. When clear-coating a wood stock without a paint base, I will apply three (3) coats of final clear over five or six coats of heavier "build" clear. This is described in the section below.
Drying--Very IMPORTANT: Allowing adequate drying time is critical. This is where some novice painters struggle because they want to wrap up the job too early. Be patient. Wait at least 24 hours before you touch the clearcoat. After hardening/drying for a couple of days it will be ready for wet sanding and buffing.
Since we weren't overly concerned with weight on the Borden-style HV stock below, I gave it four (4) coats of clear. Believe it or not, after the sanding and painting, it now weighs exactly the same as when I started: 1 pound, 15.9 ounces.

You can also apply clear-coat over a factory gelcoat finish, after proper preparation. When clear-coating over gelcoat, wet-sand to 400 grit then wipe the stock down with reducer to remove any residue. Remember that any flaws that show in the stock will be magnifies after clear coating. Sometimes you can take epoxy and color it to match to fill any holes or blemishes prior to clear coating.
Clear-coating over gelcoat can be particularly effective with the McMillan marbled gelcoat finishes. The clear-coat adds gloss and enhances the contrast among the marbled colors making them more vivid. The clear-coat also adds some protection to the stock and reduces friction in the bags, allowing it to track more easily. Below is a McMillan Sako-pattern hunting stock with clear-coat applied over the
green/black/white marble gelcoat.

Mike's EXPERT TIPS for Clear-Coating Laminated Stocks

When finishing laminated stocks with clear-coat, you need to prepare the wood carefully, and build up quite a few thin layers one at a time. Begin by sanding, with progressively finer paper, all the way to 400 grit. Certain laminated stocks are so rough when they come from the stock-maker, that you may have to be very aggressive at first. But be careful with angles and the edges of flats. You don't want to round these off as you sand.
After sanding, use compressed air to blow out all dust from the pores of the wood. This is very important to avoid a "muddy" looking finish. If you don't blow the dust out with air before spraying the clear it will migrate out as you apply the clear. Also, after each sanding session, clean your painting area to remove excess dust. I also wet down the floor of my spray booth to keept the dust down.
Some painters recommended using a filler to close the pores. That's one technique, but the filler can detract from the clarity of the final finish. Rather than use a pore-filling sealer, I use a high solids or "build" clear for the initial applications. This is slightly thicker than "finish" clear and does a good job of sealing the pores. Three (3) fairly heavy coats of "build" clear are applied. If you get a thick spot or a run in the finish at this point, it is not the end of the world but this does create more sanding work.
 After waiting for the build coats to dry, sand the stock to 400 grit again. At this point don't be disappointed on how the stock looks. You will not be able to fill all the grain with just one application. Another application of three (3) coats of "build" clear should be applied and sanded to 400 grit. Depending on the density of the wood you now should have the grain filled (after six (6) total coats of "build" clear). If not, do one more application with the high build. If all the pores are filled then apply three (3) coats of low solids or "flow" clear. When dry, the "flow" clear is wet-sanded to 1000 then 2000 and buffed. A normal stock will take from 9 to 12 total coats of clear. After waiting for the build coats to dry, sand the stock to 400 grit again. At this point don't be disappointed on how the stock looks. You will not be able to fill all the grain with just one application. Another application of three (3) coats of "build" clear should be applied and sanded to 400 grit. Depending on the density of the wood you now should have the grain filled (after six (6) total coats of "build" clear). If not, do one more application with the high build. If all the pores are filled then apply three (3) coats of low solids or "flow" clear. When dry, the "flow" clear is wet-sanded to 1000 then 2000 and buffed. A normal stock will take from 9 to 12 total coats of clear.
After the final coat of clear, proceed with the final wet-sanding and buffing as described in Part Seven below. When you wet-sand, you will dull down the finish. Don't be discouraged. The wet-sanding process is important to smooth out any imperfections. Remember you've got 9 or more coats of clear on the stock at this point. The final buffing and polishing will restore the high gloss and "wet look" you are trying to achieve. For a hunting rifle, you may want to leave more of a satin finish, without a mirror shine. You can do this by using a lower grit compound (1500 vs. 3000).
Photo of Shehane Trackers, Copyright © 2006, D&B Supply. These two stocks are not Mike Ricklef's work, though Mike has extensive experience working with Shehane stocks in Obeche and other woods. |
| 7 | FINAL FINISH -- Wet Sand and Buff |
The final finishing stage is what brings out the high gloss and that mirror-quality shine in your stock. Wet-sanding and careful buffing/polishing can produce spectacular results, with a "wet-look" finish. But, before you get that end result, you actually need to smooth the finish, eliminating some of the gloss in the clear-coat. Then, after the finish is super-smooth, you restore the shine by buffing and polishing.

 For the final work on the stock, I use dish soap, buffing compound, swirl remover, hand glaze, wet/dry paper, and a foam buffing wheel. Wet sanding starts with 1000 grit. The pictures do not show much detail but this step knocks the surface down to one level and removes any orange peel or dirt nibs in the clear coat. That is very important to achieve a mirror-like finish at the end. But after wet-sanding the stock will be dull at this point. Don't worry--the gloss will re-appear after buffing. For the final work on the stock, I use dish soap, buffing compound, swirl remover, hand glaze, wet/dry paper, and a foam buffing wheel. Wet sanding starts with 1000 grit. The pictures do not show much detail but this step knocks the surface down to one level and removes any orange peel or dirt nibs in the clear coat. That is very important to achieve a mirror-like finish at the end. But after wet-sanding the stock will be dull at this point. Don't worry--the gloss will re-appear after buffing.
SANDING TIP: After wet-sanding with 1000 grit, the job progresses to 2000 grit. A little dish-washing detergent in the water will make the paper last longer as it helps to flow out the particles. Use clean water and plenty of it. You are trying to achieve a mirror-like surface and lots of water helps smooth away small imperfections, while carrying away the sanding residues.


When wet-sanding, you must be careful on the edges. A little too much sanding here will make you start all over again. You can see the finish get duller as you work, so be conservative and use a light hand. However, if there are any shiny spots (low spots) at this point you need to keep sanding to level them out. But be gentle and use plenty of water. You want to level the surface, not scratch it.

After the final wet-sanding with 2000 grit, the next step is buffing using a clean foam pad. It is important to use a clean pad so you don't scratch the finish or leave any residues from previous jobs. I begin the buffing process with DuPont "Perfect It" compound. After that I switch pads and go to the Meguiar's Swirl Remover. Be sure to shake the bottle thoroughly before use, and watch out for clumps. Finally a Hand Glaze is applied. The final glazing step is what really brings out the shine. You might want to practice on a sample first so you get the feel for how hard to work the pad. I do all this buffing at about 1000 RPM (under power) with a foam pad. Be very careful on the edges as you can buff right through the clear in short order. If you put a run in the base coat you pretty much have to go back and recoat. But a run in the clear is not the end of the world. Using 600 grit paper and a lot of patience, you can sand out a run like it was never there. You have to be careful that the clear is fully cured as the run is a thicker area, so it takes longer to cure out.
Tools of the Trade--Recommended Gear & Supplies

You need good tools and equipment to create great paint jobs. Use high-quality sprayers, and keep sufficient quantities of the disposables (tape, paper cups, tack cloth) so you always have fresh materials on hand. The photo shows some of the gear I use. Click here for a full-screen version.
Paint Guns: I normally use an airbrush plus a gravity feed touch-up gun (upper right in photo). The gravity feed of the touch-up gun, along with the smaller cup, allows more of the paints to be used with less waste. A suction-type touch-up gun can be used as well, but I've found you can never get all the paint out of the cup. The large spray gun shown can be overkill; using it you can wind up spraying more into the air than on your stock.
Compressed Air: Clean, dry air is required--and that means you need to buy, rent, or borrow a quality air compressor. Use a filter and water trap on your compressor.
Mixing/Measuring Cups: With today's catalyzed products, proper mixing is essential. Using graduated cups helps ensure you get your mix quantities right every time.
Filters: Use paint strainers to remove clumps, dirt etc. in all the materials you apply. As noted, you should fit a filter to your air compressor as well.
Tape: Don't skimp on tape. Use a good automotive-grade masking tape. Typical, inexpensive yellow masking tape can let paint leak through, and it will not give a good sharp boundary when removed.
Tack Cloths: Use these to remove dust in between applications. Keep plenty on hand.
FINAL WORD--ABOUT SAFETY: Always remember "safety first". Read the instructions and follow all manufacturer recommendations for the application of the products you choose. You should also have proper safety gear. At a minimum, this includes: gloves, respirator, and safety glasses. You should also keep a fire extinguisher nearby.
Be careful with the materials you are spraying. Many of the products contain isocycanates, which are pretty nasty to your health. Proper ventilation is also required. I really want to stress how important good ventilation is--from start to finish of the job. Follow all regulations regarding disposal of unused and waste painting products. |
Copyright © 2006, AccurateShooter.com | 6mmBR.com, All Rights Reserved. No reproduction of any content without advanced permission in writing.
Topics: Mike Ricklefs, Affordable Stock Painting, stock, benchrest stock, laminate, clearcoat, clear, clearcoat, paint, primer, sanding, putting, filler, base-coating, metallic, candy-coat, buffing, wet-sanding.


|

